The best car paint chip repair kit depends on the depth of the damage and your experience level. For most drivers dealing with road rash and scattered stone chips, Dr. ColorChip is the top all-round pick. It delivers color-matched, near-invisible results in about 30 minutes with minimal skill required. For deeper single chips or show-car finishes, the Langka Paint Chip Repair Kit (used with OEM paint) yields more precise results. Budget-conscious repairs can use a Dupli-Color touch-up pen for quick, single-chip fixes. Always locate your car’s OEM paint code (typically on a sticker inside the driver’s door jamb) before purchasing any kit.
Key Points
- Paint chip repair kits range from simple touch-up pens ($10–$20) to comprehensive two-component systems ($40–$80+); matching the kit to your damage type prevents wasted effort and money.
- Locating your OEM paint code is the single most important step before buying. An incorrect color match is the number one reason DIY chip repairs fail to blend.
- Surface-level scratches (no bare metal visible) respond well to scratch repair compounds; chips that expose primer or bare metal require actual touch-up paint to prevent rust.
- Temperature and humidity at the time of application directly affect dry time and adhesion. Most manufacturers recommend applying between 60°F and 90°F (15°C–32°C) in low-humidity conditions.
- A professional paint shop repair for a single panel typically costs $300–$900; a quality DIY kit achieves results that pass the “10-foot test” for a fraction of that price.
Why Paint Chips Need Immediate Attention
A paint chip may look like a minor cosmetic inconvenience, but left untreated, it becomes a rust problem within weeks. When a stone or road debris breaks through the clear coat and color coat layers, it exposes either the primer or the bare metal beneath. Moisture, road salt, and oxygen then begin oxidizing that exposed metal. What starts as a chip the size of a grain of rice can spread into a rust bloom covering several square inches within a single winter season.
According to the National Highway Traffic Safety Administration (NHTSA), rust-related structural deterioration is a contributing factor in thousands of vehicle safety defects reported annually. While small surface chips rarely threaten structural integrity immediately, the corrosion they allow can compromise body panels, suspension mounts, and frame rails over time, particularly in regions where road salt is used heavily. Addressing chips promptly with the right repair kit is one of the most cost-effective forms of vehicle maintenance available to any car owner.
Professional bodywork for a single door panel typically costs between $300 and $900, depending on the shop, location, and paint complexity. A quality DIY paint chip repair kit costs between $15 and $80 and, when applied correctly, delivers results that are invisible at normal viewing distances, what the detailing industry commonly calls the “10-foot test.”
Understanding Automotive Paint Layers
Effective chip repair starts with understanding what you are actually repairing. Modern factory paint systems are built in three to four layers applied over the bare metal substrate:
- E-coat (electrocoat primer): Electrostatically applied directly to bare metal at the factory, this layer provides the primary corrosion barrier and is rarely visible in a chip unless the damage is severe.
- Primer surfacer: A gray or white layer applied over the e-coat that fills surface imperfections and provides adhesion for the color coat. This is the layer most commonly exposed in a typical road chip.
- Color coat (base coat): The pigmented layer that gives the car its color. Metallic and pearl finishes contain light-reflective flakes suspended in this layer, which is why color-matching these finishes is more complex than matching solid colors.
- Clear coat: A transparent, UV-resistant topcoat that protects the color layer and provides the glossy finish. Clear coat is typically 1.5–2.5 mils thick on a factory finish, according to automotive finishing standards published by the Society of Automotive Engineers (SAE).
Knowing which layers a chip has penetrated tells you exactly what products you need. A chip that only scratches the clear coat needs a polishing compound, not touch-up paint. A chip that reaches bare metal needs primer, color coat, and clear coatin that orderfor a durable, rust-resistant repair.
How to Identify Your OEM Paint Code
The single most important step before purchasing any color-matched repair kit is locating your vehicle’s OEM (original equipment manufacturer) paint code. This alphanumeric code tells the kit supplier exactly which pigment formula your car left the factory with. Using a generic “close enough” color almost always results in a visible color mismatch, especially in metallic and pearl finishes.
Paint code locations vary by manufacturer but are consistently found in the following places:
- Driver’s door jamb sticker: The most common location on nearly all North American vehicles. Look for a barcode sticker or metal plate listing vehicle information; the paint code is usually labeled “Color,” “Paint,” or “Ext. Color” and consists of two to six characters.
- Under the hood, on the firewall: Common on older domestic vehicles from Ford, GM, and Chrysler.
- Trunk lid or spare tire well: Common on several Toyota and Honda models.
- Passenger door jamb or B-pillar: Used on some European brands, including BMW and Mercedes-Benz.
If the sticker is worn or missing, the paint code can also be decoded from the vehicle identification number (VIN) using the manufacturer’s online lookup tools or by contacting a dealership’s parts department. Reputable kit suppliers like Dr. ColorChip and Langka provide an online color-matching tool where you enter your paint code to receive a precisely formulated match.
Types of Car Paint Chip Repair Kits
Not every chip repair situation calls for the same product. The four main kit types each occupy a distinct role in the repair spectrum:
| Kit Type | Best For | Skill Level | Approximate Cost | Result Quality |
| Touch-uppen/brushh bottle | Single chips, quick fixes | Beginner | $10–$25 | Covers rust exposure; visible up close |
| Complete chip repair system (e.g., Dr. ColorChip) | Road rash, scattered chips | Beginner–Intermediate | $35–$65 | Near-invisible at 10 feet or more |
| OEM paint + blending system (e.g., Langka) | Precision single-chip repairs, show cars | Intermediate | $45–$80 (paint sold separately) | Excellent color accuracy; requires patience |
| Aerosol touch-up + clear coat (e.g., Rust-Oleum) | Larger damaged areas, multiple chips on one panel | Intermediate | $20–$50 | Good coverage; blending at edges is challenging |
The 5 Best Car Paint Chip Repair Kits
1. Dr. ColorChip Road Rash Kit Best Overall
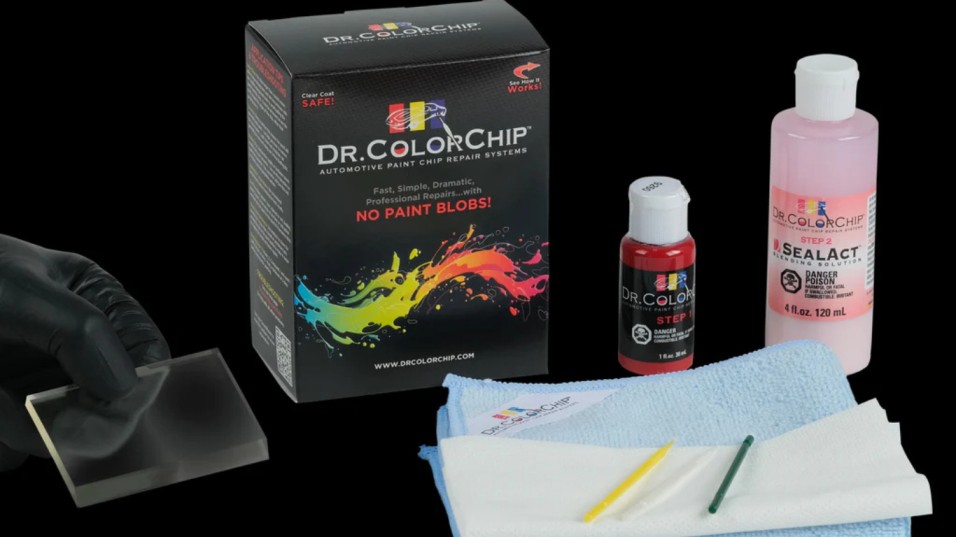
Dr. ColorChip is the most consistently recommended paint chip repair system among detailing professionals and enthusiast communities for good reason. The kit’s proprietary color-matched paint is formulated using the same base pigment data that automotive paint suppliers use, which produces a match accuracy noticeably better than generic alternatives for most factory colors.
The system works differently from traditional touch-up paint. Instead of carefully dabbing paint only inside each chip, you apply the color-matched paint generously over the entire damaged area- road rash, chips, and all- let it set for a few minutes, then wipe the excess away using the included SealAct blending solution. The SealAct solution removes paint from the surrounding undamaged clear coat while leaving it locked inside the chips, which eliminates the raised paint “blob” that is the signature look of a failed DIY touch-up job.
A standard Road Rash Kit includes color-matched paint, the SealAct blending fluid, applicator sponges, and a microfiber cloth. The squeegee kit adds a rubber applicator that works particularly well for long scratches. Most repairs covering an area up to the size of a sheet of paper take approximately 20–30 minutes from start to finish.
Limitations: Dr. ColorChip’s paint formulas use a lacquer-based system rather than a catalyzed 2K urethane. This provides excellent workability and the ability to blend, but the repaired area is slightly less chemically resistant than the surrounding factory clear coat. Industry best practice, as noted in Dr. ColorChip’s application instructions, is to avoid machine polishing the repaired area for a minimum of 30 days after application to allow full cure.
- Best for: Road rash, scattered stone chips, daily drivers
- Price range: $35–$65 depending on kit size
- Color options: Available for virtually all domestic and import vehicle colors
2. Langka Paint Chip Repair Kit Best for Precision Results
The Langka system takes a different approach: it is a blending and removal system rather than a self-contained paint kit. You purchase the Langka kit separately and use it with your vehicle’s OEM factory touch-up paint (available from dealerships or online automotive paint suppliers). This means the paint formula is exactly what your manufacturer used, which produces the most accurate metallic flake and pearl distribution of any DIY method, a factor that matters significantly on silver, blue pearl, and other complex factory finishes.
The process involves cleaning the chip area with Langka’s PrePaint solution, applying the OEM paint to fill the chip (it is acceptable to overfill slightly, creating a small raised “blob”), allowing it to dry for two hours or more, and then applying the Langka Blob Eliminator cream to dissolve the excess paint from the surrounding surface. The result is a flush, clean fill that closely mimics the factory finish.
The tradeoff is time and patience. The minimum recommended dry time between paint application and blob elimination is two hours, and achieving the best results on large road rash areas requires multiple sessions. The blob eliminator also has a strong solvent odor; gloves are strongly recommended during application.
Limitations: The multi-step, multi-day process makes Langka impractical for drivers who want a quick one-session repair. It also works better on larger individual chips and long scratches than on densely clustered small chips (road rash), where the precision application becomes difficult.
- Best for: Individual deep chips, show-car finishes, metallic and pearl colors
- Price range: $20–$35 for the kit; OEM paint sold separately ($10–$30)
- Color options: Any color, since you supply the OEM paint
3. Dupli-Color Scratch Fix All-in-One Best Budget Option
For drivers who simply need to cover a chip, stop rust from forming, and move on without investing significant time or money, the Dupli-Color Scratch Fix All-in-One pen is the most practical entry-level solution. The pen-style applicator delivers color-matched touch-up paint directly onto the chip with precision. Many versions include a clear coat application tip on the opposite end of the pen.
Results are functional rather than invisible. Up close, a touch-up pen repair typically shows as a slightly different texture or sheen compared to the surrounding factory paint. At normal viewing distances across a parking lot or from a curb, the chip is effectively hidden. The primary purpose of this type of repair is rust prevention, and the Dupli-Color system fulfills that purpose reliably at a low cost.
- Best for: Single chips, rust prevention, temporary fixes
- Price range: $10–$20
- Color options: Wide selection of OEM codes available; use your paint code for best match
4. Rust-Oleum Automotive Touch-Up Kit Best for Larger Areas
When the damage extends beyond scattered chips to a larger affected zone, such as the lower portion of a front bumper after extensive highway driving, an aerosol-based system provides coverage that a chip pen or brush simply cannot match efficiently. The Rust-Oleum Automotive Touch-Up kit includes primer spray, color coat spray, and clear coat spray, covering the full three-layer repair process in a single package.
The aerosol format allows for feathered edges when applied correctly, which helps blend the repaired area into the surrounding undamaged paint. For best results, the affected area should be sanded lightly with 800-grit wet sandpaper, then 1500-grit, before paint application. After the color coat and clear coat have fully cured (typically 24–48 hours), buffing with a polishing compound smooths the transition between the repaired area and the original clear coat.
- Best for: Larger damaged areas, front bumpers, lower rockers
- Price range: $20–$50
- Color options: Broad selection; spray format requires a more precise color match than brush systems
5. Carfidant Scratch and Swirl Remover Best Finishing Polish
Carfidant occupies a specific and important role: it is a finishing step, not a chip-fill system. After filling chips with any of the kits above, the repaired area often has slight texture irregularities or a different sheen than the surrounding factory clear coat. Carfidant’s compound uses fine abrasive particles to level the clear coat surface around the repair, remove light swirl marks, and restore uniform gloss.
The formula is approved for all paint types- single-stage, base coat/clear coat, and multi-stage finishes- and is safe for use on all vehicle colors. The manufacturer provides a 2-year warranty on the product, which is unusual at this price point and reflects confidence in the formula’s stability and shelf life.
Limitation: Carfidant does not fill chips or repair damage that extends below the clear coat. It is strictly a polishing and finishing product and should be used after chip repairs have fully cured, not as a standalone repair solution.
- Best for: Post-repair finishing, light swirl removal, restoring uniform gloss
- Price range: $15–$25
- Color options: Universal; suitable for all colors
Step-by-Step: How to Repair a Paint Chip
The following process applies to the most common scenario: a chip that has penetrated to the primer layer on a base coat/clear coat finish. Adapt the steps based on your chosen kit’s specific instructions.
- Wash and dry the area thoroughly. Wax, polish residue, and road grime prevent paint adhesion. Clean the chipped area and a 6-inch radius around it with isopropyl alcohol (70% or higher) applied to a microfiber cloth.
- Assess the depth. If you can see bright metal, the chip has reached bare metal, and a primer step is required before color. If you see a gray or white surface, you are down to primer; skip straight to color coat application. If the chip only scuffs the clear coat with no color loss, a polishing compound alone may be sufficient.
- Apply primer if bare metal is exposed. Use a touch-up primer pen or a fine-tipped brush to apply a thin layer of automotive primer inside the chip only. Allow 30–60 minutes to dry before applying color.
- Apply color-matched touch-up paint. Using your chosen kit’s applicator, fill the chip with color coat paint. Overfill slightly to account for shrinkage as the paint dries. Allow to dry per the kit manufacturer’s instructions, typically 2–4 hours for brush-applied lacquers, longer in cool or humid conditions.
- Level the repair. Once fully dried, use the kit’s included blending solution (Dr. ColorChip’s SealAct or Langka’s Blob Eliminator) to remove excess paint from the surrounding surface, leaving paint only inside the chip. If using a basic touch-up pen, carefully wet-sand the dried repair with 2000-grit sandpaper to level any raised edges.
- Apply clear coat if required. Some kits include clear coat; others expect the factory clear coat to flow over the repair during regular driving. For deep chips, a small application of touch-up clear coat protects the color fill and improves the blend.
- Polish and finish. After the repair has cured for at least 24 hours (or 30 days before machine polishing), apply a finishing compound like Carfidant to blend the sheen and remove any swirl marks introduced during the repair process. Follow with a coat of carnauba wax to protect the entire area.
Factors That Affect Color Match Accuracy
Even with the correct OEM paint code, several factors can cause a touch-up repair to look slightly different from the surrounding factory paint:
- Paint fade and oxidation: Factory paint changes color slightly over time due to UV exposure. A brand-new paint formula matched to a 5-year-old faded finish will appear slightly brighter than the surrounding paint. Industry best practice among detailing professionals is to polish the surrounding area with a light abrasive compound before applying the touch-up, which removes the oxidized surface layer and brings the surrounding paint closer to its original color.
- Metallic and pearl complexity: Metallic flakes and pearl pigments orient differently depending on application method (spray versus brush versus wipe). Factory paint is applied by robot sprayers at precise distances and angles that a DIY applicator cannot replicate exactly. This means metallic repairs almost always look slightly different up close; the goal is an acceptable blend rather than perfection.
- Clear coat sheen variation: Touch-up clear coat applied in small areas often cures with a slightly different gloss level than the surrounding factory clear. A polishing compound applied after full cure significantly reduces this difference.
- Temperature during application: According to automotive coating technical data sheets published by major paint manufacturers including PPG and BASF, most solvent-based touch-up paints require application temperatures between 60°F and 90°F (15°C–32°C) for proper flow and adhesion. Applying paint in cold weather slows solvent evaporation and can cause cloudiness or poor adhesion.
When to Call a Professional
DIY chip repair produces excellent results on small to moderate chip damage, but there are specific situations where professional bodywork is the more appropriate and cost-effective choice:
- Chips or scratches longer than 3–4 inches that span multiple body lines or panel edges
- Damage that has already developed active rust-orange staining or bubbling around the chip indicates rust has penetrated below the primer, requiring mechanical removal before any paint can adhere.
- Damage on high-visibility areas of a near-new or high-value vehicle where appearance standards are critical
- Clear coat delamination, large areas where the clear coat is peeling or flaking, cannot be repaired with touch-up products and require wet sanding, re-spraying, or full panel refinishing.
For these situations, obtaining estimates from two or three certified body shops is advisable. Shops certified by the Inter-Industry Conference on Auto Collision Repair (I-CAR) have verified technician training standards, which is a useful benchmark when evaluating quality.
Frequently Asked Questions
What is the best car paint chip repair kit for road rash on a daily driver?
Dr. ColorChip’s Road Rash Kit is the most practical solution for scattered stone chips and road rash on a daily driver. It produces near-invisible repairs in a single 30-minute session using color-matched paint and a proprietary blending solution that removes excess paint from the surrounding clear coat. Order the kit by entering your vehicle’s OEM paint code on the Dr. ColorChip website for a color-matched formula.
How do I find my car’s paint code?
The paint code is most commonly found on a sticker inside the driver’s door jamb. It is labeled “Color,” “Paint,” or “Ext. Color” and typically consists of two to six alphanumeric characters. If the sticker is missing or worn, your vehicle’s VIN can be used to look up the paint code through the manufacturer’s parts portal or a dealership’s parts department.
Can I repair a paint chip myself if I have never done it before?
Yes. Beginner-friendly systems like Dr. ColorChip are specifically designed for first-time users and include all necessary materials, with step-by-step instructions. The most common beginner mistake is applying too little paint and not filling the chip; err on the side of slightly overfilling, since the excess is removed during the blending step.
Will a paint chip repair kit fix deep scratches?
Paint chip repair kits are designed for chips in areas where paint has been fully removed. Deep scratches that you can feel with your fingernail, but that have not fully removed paint down to bare metal, can often be improved but not made invisible by chip repair products. Scratches that cross multiple paint layers and expose bare metal require the same primer, color coat, and clear coat process as chips.
How long does a DIY paint chip repair last?
A properly applied chip repair using a quality color-matched system can last several years under normal driving conditions. Longevity depends on the curing characteristics of the specific product, the UV exposure the vehicle receives, and whether the repaired area is protected with regular waxing. Lacquer-based systems like Dr. ColorChip are slightly less chemically resistant than factory 2K urethane clear coat, so they benefit from a coat of carnauba wax applied over the repair after full cure.
Is it worth repairing paint chips on an older high-mileage vehicle?
Rust prevention is always worth addressing, regardless of vehicle age. On an older vehicle where cosmetic perfection is less of a priority, a basic touch-up pen or brush application with the correct paint code is a cost-effective way to seal exposed metal and stop rust from forming, without investing in a premium repair system.
What temperature is best for applying touch-up paint?
Most automotive touch-up paint products are formulated for application between 60°F and 90°F (15°C–32°C) at low to moderate humidity. Applying in temperatures below 50°F can cause poor adhesion and extended dry times. Direct sunlight during application can cause the paint to dry too quickly on the surface while remaining wet underneath, leading to wrinkling. Choose a shaded location or work during cooler morning hours in warm climates.
Conclusion
Paint chips are inevitable on any vehicle driven on real roads, but they do not have to become rust problems or expensive body shop visits. Choosing the right repair kit comes down to three variables: the depth of the damage, the complexity of your paint finish, and the time you are willing to invest in the repair.
For most drivers dealing with routine road rash and scattered chips, Dr. ColorChip delivers professional-quality results with beginner-level effort. For high-accuracy work on metallic or pearl finishes, the Langka system paired with OEM paint is the more demanding but more precise choice. Touch-up pens serve well as a quick rust-prevention measure when time or budget is limited.
Whatever kit you choose, the process begins at the driver’s door jamb. Locate your OEM paint code first, and the rest follows logically. A chip repaired today costs ten minutes and twenty dollars. A rust patch ignored for one winter can cost a panel replacement.
Ready to get started? Locate your paint code, choose the kit that matches your repair type, and address those chips before the next rain brings moisture to bare metal.